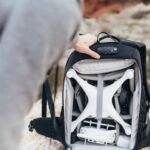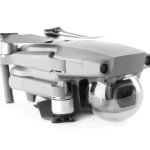
Dji Drone Camera Settings knowledge are very important for all those who ants to fly successfully. DJI drones are provide with advanced camera systems designed to provide high-quality images and videos for various applications. It including aerial photography, videography, surveying, and mapping. To understanding how to adjust the camera settings on your DJI drone can greatly increase your flying experience and make sure that you capture the best possible content. Below is a guide to the main and important DJI drone camera settings, how to use them effectively, and some tips for getting the best results.
1. Resolution and Image Quality
- Recommended Setting:
- Still Photos: Set to highest resolution (e.g., 20 MP, 48 MP, or 50 MP, depending on the drone model).
- Video: Set to 4K or higher (e.g., 4K/30fps, 4K/60fps) for the best video quality.
- Why:
- High-resolution settings are important for obtaining sharp, detailed images, especially for applications like mapping, surveying, and photogrammetry.
- In video settings, a higher resolution make sure clearer, sharper footage. Which is beneficial for professional-grade video content.
- Tip:
- For mapping and survey work, RAW image format is preferred as it provides more data for post-processing.
2. Shutter Speed
- Recommended Setting:
- Still Photos: Use 1/500 to 1/1000 sec for moving subjects or high-speed flights.
- Video: Use 1/50 or 1/60 sec for a natural motion blur in videos.
- Why:
- Faster shutter speeds (e.g., 1/500 sec) help to avoid motion blur when the drone is moving quickly or when capturing fast-moving objects.
- For video, a slower shutter speed (such as 1/50 sec) is typical, as it helps to achieve smoother, cinematic footage with natural motion blur.
- Tip:
- Use ND filters to achieve proper exposure at slower shutter speeds without overexposing the image.
3. ISO (Light Sensitivity)
- Recommended Setting:
- ISO 100 to 400 for optimal image quality.
- Why:
- ISO 100 to 400 keeps the image noise-free in good lighting conditions. A low ISO is essential for sharp, clear images, especially when capturing fine details.
- For low light conditions or sunset/sunrise shots, you may need to increase the ISO, but avoid going beyond ISO 800 to prevent graininess.
- Tip:
- Always try to keep the ISO as low as possible to preserve image quality, especially in daylight.
4. White Balance
- Recommended Setting:
- Manual White Balance: Set to 5500K (Daylight) or 6000K (Cloudy) depending on lighting conditions.
- Auto White Balance: Use if unsure about the lighting but check for consistency in your photos.
- Why:
- Manual white balance helps avoid unwanted color shifts during your flight, especially in dynamic lighting conditions.
- 5500K is ideal for daylight, while 6000K is better for cloudy conditions.
- Tip:
- Avoid using Auto White Balance for long flights as it might adjust during the flight, causing inconsistent image colors.

5. Camera Angle (Gimbal Control)
- Recommended Setting:
- Manual or Preset Camera Angles (such as 90° for vertical or 45° for oblique shots).
- Why:
- Maintaining a fixed camera angle ensures consistency throughout the flight. It’s essential for tasks like mapping or creating orthophotos, as slight changes in camera angle can affect data accuracy.
- For aerial photography or videography, manually adjusting the angle can help capture the desired composition.
- Tip:
- Set the gimbal to fixed positions to avoid inconsistent angles. If you need dynamic shots, you can adjust the gimbal as needed.
6. Exposure Settings (Auto vs. Manual)
- Recommended Setting:
- Manual Exposure (preferred for consistency) or Auto Exposure Lock (AEL) for some situations.
- Why:
- Manual Exposure provides full control over ISO, shutter speed, and aperture. It’s crucial when shooting in conditions with changing lighting.
- AEL locks the exposure settings in place to prevent the camera from adjusting itself during the flight.
- Tip:
- Avoid using Auto Exposure unless absolutely necessary, as it may change settings during flight and lead to inconsistent shots.
7. ND Filters (Neutral Density Filters)
- Recommended Setting:
- Use ND16, ND32, or ND64 depending on sunlight conditions.
- Why:
- ND filters help to reduce light entering the camera and allow the drone to maintain proper shutter speed, especially in bright sunlight.
- They prevent overexposure and allow for smoother video footage by enabling the correct motion blur.
- Tip:
- ND filters are especially useful when filming video at lower shutter speeds (e.g., 1/50 sec for cinematic footage).
8. Image Format
- Recommended Setting:
- RAW for still photos (provides more flexibility for post-processing).
- JPEG for quick, smaller image sizes with less post-processing.
- Why:
- RAW images retain more detail and allow for more extensive editing in post-production, especially when correcting exposure, white balance, or recovering details from shadows and highlights.
- JPEG is a compressed format, so it’s easier for quick sharing, but it doesn’t allow much room for correction in editing.
- Tip:
- Use RAW for mapping, surveying, and professional photography. Use JPEG for casual shots or when you need smaller file sizes.
9. Overexposure Warning (Histogram and Zebra Stripes)
- Recommended Setting:
- Enable Histogram and Zebra Stripes (in DJI app settings).
- Why:
- The Histogram displays the distribution of light in your image, helping you avoid overexposure or underexposure.
- Zebra Stripes highlight areas of your image that are overexposed, showing where highlights are losing detail.
- Tip:
- Adjust exposure to avoid overexposing bright areas (such as skies). Keep the histogram slightly left of center for optimal exposure.
10. GPS and Geo tagging
- Recommended Setting:
- Enable GPS geo tagging (for mapping and surveying applications).
- Why:
- Geo tagging embeds GPS coordinates into the metadata of your images, which is essential for tasks such as aerial mapping, photogrammetry, and survey work.
- DJI drones typically include GPS data in the EXIF information, but it’s essential to ensure that this feature is active before takeoff.
- Tip:
- For surveying or mapping, ensure RTK or PPK data is available for the most accurate positioning data.
11. Flight Mode (Camera Settings Based on Flight Conditions)
- Recommended Setting:
- P-Mode (Positioning Mode) for stable flying and consistent camera performance.
- Sport Mode (for faster flights) but with limited camera stability.
- Why:
- P-Mode allows for precise, stable control of the drone and camera, which is crucial for capturing high-quality images, especially for mapping and survey work.
- Sport Mode can be useful for quick shots, but the drone’s stability may not be ideal for photography or video.
- Tip:
- Stick to P-Mode for photography, especially in mapping, surveying, and photogrammetry scenarios where stable images are essential.
12. Gimbal Calibration
- Recommended Setting:
- Calibrate the Gimbal before each flight for consistent camera behavior.
- Why:
- The gimbal ensures the camera remains steady during flight, and calibrating it before each flight ensures proper performance. A misaligned gimbal can cause unintended shakes, resulting in poor-quality images or video.
- Tip:
- Calibrate the gimbal if you’ve transported the drone or experienced a rough landing.
13. Focus Settings
- Recommended Setting:
- Auto Focus or Manual Focus (depending on the model and camera)
- Why:
- If your DJI drone has a manual focus, adjust the focus to ensure sharp details, especially for close-up shots.
- Auto Focus generally works well for most situations, but manual focus may be required for specific applications such as high-precision surveying.
- Tip:
- Always double-check the focus settings when capturing close-up or highly detailed subjects.
Watch Video For Setting:
Conclusion
Optimizing your DJI drone camera settings is essential for capturing high-quality aerial footage. Understanding key settings such as resolution, ISO, shutter speed, white balance, and focus can significantly improve your results. While issues like blurry images, overexposure, or choppy footage may arise, they can be easily resolved with proper adjustments, such as using ND filters, selecting the right frame rate, or manually setting the focus. Regularly updating firmware and using high-speed SD cards also help ensure smooth operation. By mastering these settings and troubleshooting common problems, you can maximize your DJI drone’s photography and videography potential.