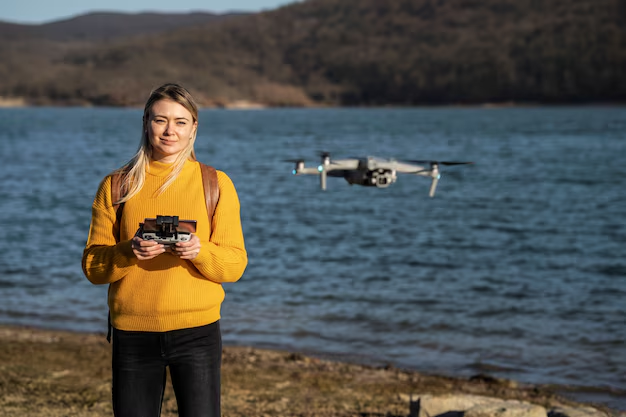
Learning how to add a wireless camera to a drone allows you to capture real-time footage. It can increase navigation, and expand your drone’s capabilities. By selecting a compatible camera, setting up a reliable power source, and configuring a strong wireless connection. You can ensure smooth video transmission and optimal performance. Proper mounting and testing are important to achieving stability and high-quality footage. Whether for recreational or professional use, integrating a wireless camera enhances your drone’s functionality, It can opening up new possibilities for aerial photography, surveillance, and live streaming. With the right setup and adjustments, you can take full advantage of your drone’s potential and achieve impressive aerial visuals.
Step 1: Understand the Drone’s Capabilities
Check Payload Capacity
- Ensure the drone can handle the weight of the camera and transmitter.
- Include a gimbal if stabilization is required.
Check Power Supply
- Identify the drone’s voltage output.
- Decide if the camera will use the drone’s battery or an external power source.
Step 2: Choose the Right Wireless Camera
Types of Cameras
- FPV (First-Person View): Provides a live video feed to goggles or monitors. Low latency but lower video quality.
- Examples: Runcam Nano 2, Foxeer Micro.
- HD Action Cameras: For high-resolution recording (4K/1080p).
- Examples: GoPro, DJI Action 2.
- DIY Cameras: Affordable options like the ESP32-CAM or Raspberry Pi Camera Module.
Features to Consider
- Resolution: 720p, 1080p, or 4K for filming.
- Field of View (FOV): Wide for better coverage.
- Latency: Lower for FPV; not critical for recording.

Step 3: Select a Wireless Video Transmission System
Transmission Options
- Analog FPV System:
- Suitable for low-latency live feeds.
- Components:
- Camera → Video Transmitter (VTx) → Receiver (VRx) → FPV Goggles/Monitor.
- Examples: TBS Unify Pro VTx, Fat Shark VRx.
- Digital FPV System:
- Higher video quality, slightly higher latency.
- Examples: DJI Air Unit, HDZero.
- Wi-Fi Streaming (DIY):
- Easy setup using Wi-Fi-enabled cameras like ESP32-CAM.
- Best for short-range and hobby use.
- Cellular Streaming:
- Use a 4G/5G camera for extended range but requires network access.
Step 4: Mount the Camera
Fixed Mount
- Use adhesive, brackets, or screws to attach the camera directly to the drone.
Stabilized Mount
- Use a gimbal for smooth and stable video.
- Examples: Tarot 2D/3D gimbals.
Vibration Dampening
- Add vibration isolators (rubber pads, foam) to minimize motor-induced shaking.
Step 5: Connect the Components
Power Supply
- From the Drone’s Battery:
- Use a voltage regulator to match the camera’s requirements.
- Example: A 12V camera may need a step-down regulator if the drone runs on 16V.
- External Battery:
- For heavy setups, consider a separate LiPo battery for the camera.
Wiring
- Analog FPV:
- Camera → VTx (video signal wire).
- Power and ground wires to a common source.
- Wi-Fi Cameras:
- Power the camera using the drone battery or an external battery.
- Configure the Wi-Fi module for streaming.
Step 6: Configure the Receiver and Monitor
Analog FPV System
- Use goggles or a monitor with an analog receiver.
- Examples: Fat Shark goggles, Eachine LCD monitor.
Digital System
- Connect to compatible goggles or monitors (e.g., DJI Goggles).
Wi-Fi Cameras
- Stream video to a smartphone, tablet, or laptop using apps or a browser.
Step 7: Testing
- Check Video Feed:
- Verify that the video feed is stable and clear.
- Range Test:
- Ensure the video transmitter can maintain a strong signal at the drone’s maximum range.
- Flight Test:
- Attach the camera and test the drone’s stability and performance with the added weight.
Optional Enhancements
- On-Screen Display (OSD): Overlay flight data (e.g., altitude, speed, voltage) on the video feed.
- Telemetry Integration: Send live drone data along with video.
- Long-Range Antennas: Improve signal quality and distance.
Watch Video for more Information:
Conclusion:
All these steps can help you to connect wireless camera to drone. Read all of them very carefully and understand what to do and how to do step by step.


