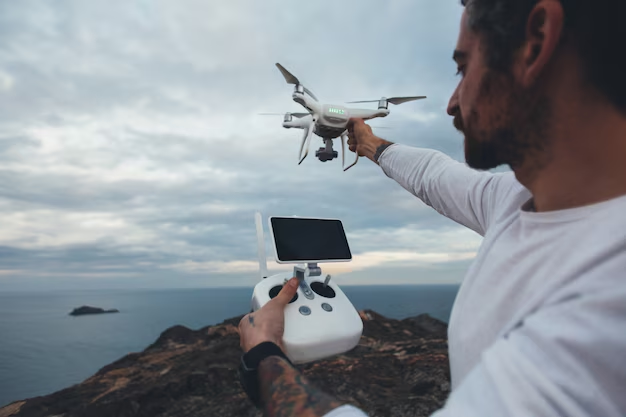
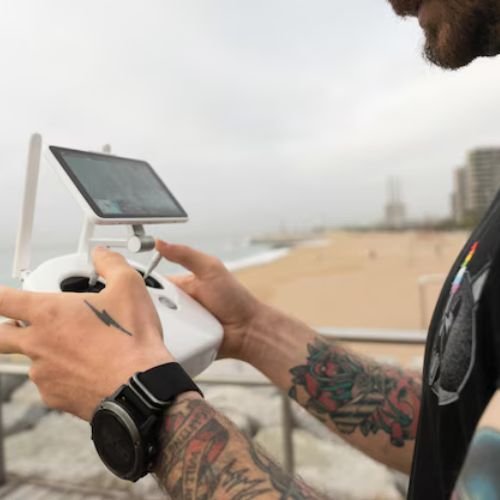
Adjusting camera on drones and stand alone cameras involves various settings and tools to optimize the video or photo output. Here’s a detailed guide on how to adjust the camera on different types of cameras, including drone mounted and traditional cameras, along with the specifications and tips.
1. Adjusting Camera on Drones
A. Commercial Drones (e.g., DJI, Parrot, Autel)
- DJI Drones (e.g., Mavic, Phantom, Air)
- Camera Settings (via App)
- Open the DJI Go/Go 4 or DJI Fly app.
- Adjust Resolution: Set the video resolution (e.g., 4K, 1080p).
- Adjust Frame Rate: Select frame rates (24fps, 30fps, 60fps, etc.) depending on the desired video smoothness.
- Camera Angle (Gimbal Control): Use the app or the remote control to tilt the camera up or down.
- ISO and Shutter Speed: Modify the camera settings for light conditions (auto or manual).
- White Balance: Adjust the color temperature (auto, sunny, cloudy, etc.).
- EV (Exposure Value): Control exposure to ensure balanced brightness.
- Camera Settings (via App)
Specifications:
- Resolution: 4K (some models support 8K).
- Frame Rate: 24fps, 30fps, 60fps, etc.
- Sensor Size: Typically 1/2.3-inch to 1-inch.
- Lens FOV: Usually 78°-94°.
Other Features:
- ActiveTrack: Automatically tracks a subject while keeping the camera focused.
- Gimbal: Stabilizes the camera during flight for smooth footage.
- Parrot Drones (e.g., Anafi, Bebop)
- Camera Settings (via FreeFlight App)
- Adjust the camera angle (pan/tilt) and resolution settings through the FreeFlight app.
- Set exposure compensation for proper lighting.
- Adjust camera tilt using the remote controller (motorized gimbal).
- Camera Settings (via FreeFlight App)
Specifications:
- Camera: 4K HDR, 180° tilt, 3-axis gimbal.
- Video: 1080p/4K.
- Frame Rate: 30fps.
Other Features:
- Smart Photography: Supports burst shots, panorama, and other creative shots.
B. DIY/Custom Drones (e.g., Pixhawk, OpenPilot)
- Mounting an External Camera (GoPro, RunCam, etc.)
- Mount the Camera: Secure the camera to a gimbal or mounting bracket.
- Connect to Flight Controller: For full control, connect via Wi-Fi or a camera control module (e.g., GoPro with Wi-Fi or RunCam with a dedicated app).
- Adjust Camera Settings (via App):
- Open the app (e.g., GoPro app, RunCam app) to control resolution, frame rate, and field of view.
- ISO/Shutter Speed/White Balance: Manually adjust for optimal light conditions.
- Tilt/Angle: Use the gimbal or remote control to adjust the camera’s pitch or yaw.
Specifications:
- GoPro: 4K, 1080p, 240fps (high frame rate for slow motion).
- RunCam: 1080p, 60fps.
- Resolution: Up to 4K.
- Field of View (FOV): 150° (wide angle).

2. Adjusting Camera on Standalone Cameras (DSLR, Mirrorless, etc.)
A. DSLR/Mirrorless Cameras (e.g., Canon, Nikon, Sony):
- Settings
- Shutter Speed: Controls motion blur (faster speeds freeze motion, slower speeds capture movement).
- Aperture (f/stop): Controls depth of field (lower f-number = more light and shallow depth of field).
- ISO: Controls light sensitivity (higher ISO is good for low-light, but may introduce noise).
- White Balance: Adjusts the color temperature (auto or presets for specific lighting conditions).
- Focus Mode: Select auto-focus or manual focus depending on the subject.
- Exposure Compensation: Adjusts brightness if auto-exposure isn’t accurate.
- Camera Orientation
- Adjust the Tilt: Use the camera’s tripod mount or gimbal to achieve different angles.
- Zoom: Adjust focal length via the zoom lens or crop in post-processing for tighter shots.
Specifications:
- Resolution: Up to 50MP (depending on the camera model).
- Sensor Size: Full-frame or APS-C for high-quality images.
- Video Resolution: 4K/1080p (depending on the camera).
- Frame Rate: 24fps, 30fps for video recording.
B. Action Cameras (e.g., GoPro, Insta360, DJI Osmo):
- Settings
- Resolution: Set to 4K or 1080p for best quality.
- Frame Rate: Choose between 30fps, 60fps, or higher for slow-motion.
- Field of View: Adjust FOV to wide, medium, or narrow depending on your needs.
- Stabilization: Turn on digital stabilization for smoother footage.
- Angle/Position: Mount the camera securely to the drone or helmet for desired shot framing.
- Adjusting Tilt/Angle
- Manual Adjustment: Use the camera’s mount to adjust the angle.
- Automatic Stabilization: Cameras like GoPro Hero 10 or Insta360 offer advanced stabilization options to ensure smooth shots, even with heavy motion.
Specifications:
- GoPro: 5.3K, 4K at 120fps, HyperSmooth stabilization.
- Insta360: 4K, 60fps, 360° capture (for immersive video).
- DJI Osmo: 4K, 60fps, 3-axis gimbal stabilization.
3. Adjusting Camera on FPV Drones (FPV Racing Drones):
- Camera Settings
- Tilt Angle: Set the camera’s tilt based on your flying style (FPV racing usually has higher angles for fast maneuvers).
- Field of View (FOV): Adjust the FOV for a wider view or a more focused perspective.
- Exposure: Adjust exposure to handle lighting changes when racing or flying in different environments.
- Use Gimbals for Stabilization: If using external cameras like GoPro, stabilize the camera using a 2 or 3-axis gimbal to keep footage smooth.
Specifications:
- Resolution: 1080p (for HD FPV cameras), GoPro for better resolution.
- Frame Rate: 60fps or higher for smooth video output.
- Latency: Low-latency video feed is critical for FPV, ideally under 30ms.

By following these steps and adjusting the camera settings for each type of camera or drone. You can optimize your shots and make sure smooth video footage and high-quality photos designer to your needs.
4. Adjusting Camera Settings on Commercial Drones:
A. DJI Drones (e.g., Mavic, Phantom, Air Series):
- Power Up the Drone:
- Turn on the drone, remote controller, and the mobile device connected to the drone’s app (e.g., DJI Fly, DJI Go 4).
- Access Camera Settings in App:
- Open the app and select the camera settings section, which is typically displayed on the main flight screen.
- Adjust Resolution:
- Set the camera’s video resolution (e.g., 4K, 1080p) via the app.
- Tap the resolution setting and choose the desired format for video or photo.
- Set Frame Rate:
- Adjust the frame rate for video recording. Common options include 30fps, 60fps, or higher for smooth video and slow-motion footage.
- Tap the frame rate setting and select a value.
- Modify Camera Angle (Gimbal Control):
- Use the on-screen slider or the physical gimbal dial on the remote control to adjust the camera’s pitch (up/down).
- Some drones allow automatic or remote control of the gimbal for more precision.
- Configure Exposure and White Balance:
- ISO: Set to Auto or manually adjust based on lighting conditions.
- Shutter Speed: Adjust according to your preference; lower speeds for smoother video or faster speeds for sharp imagery.
- White Balance: Set to Auto or manually adjust (options like Sunny, Cloudy, Tungsten, etc.).
- Set EV (Exposure Value):
- Adjust the EV to make the image lighter or darker. This is useful when shooting in mixed lighting conditions.
- Enable Stabilization (If Available):
- Enable the in-built gimbal stabilization for smooth footage.
- Ensure Electronic Image Stabilization (EIS) is turned on (if available).
- Activate Intelligent Flight Modes (Optional):
- For specific scenarios, use intelligent flight modes like ActiveTrack, Point of Interest, or Follow Me, which adjust the camera settings automatically for optimal footage.
- Test the Camera:
- Hover the drone, and adjust the camera settings to ensure the best quality and framing.
B. Parrot Drones (e.g., Anafi, Bebop):
- Power Up and Connect:
- Turn on the drone and the FreeFlight app.
- Connect the drone to the app via Wi-Fi.
- Camera Settings:
- In the FreeFlight app, go to the camera settings section.
- Adjust video resolution (up to 4K) and frame rate (usually 30fps or 60fps).
- Use the gimbal control to adjust the camera’s tilt (up/down).
- Exposure and White Balance:
- Use the app to adjust ISO, shutter speed, and white balance.
- You can also use auto-exposure for balanced lighting.
- Stabilization:
- Parrot drones come with a 3-axis gimbal, so the camera will stabilize automatically. Adjust settings in the app to control stabilization intensity.
- Test the Settings:
- Record a test video and adjust the camera further for the best shot.
5. Adjusting Camera Settings on DIY Drones (e.g., Pixhawk, Custom Drones):
A. Mount the Camera:
- Install the Camera:
- Secure the camera to the drone using a gimbal or mounting bracket.
- Ensure the camera is stable and correctly aligned.
- Connect the Camera:
- For an external camera (e.g., GoPro), connect it to a power source or a dedicated camera control module.
- For Wi-Fi cameras, connect via the camera’s app (e.g., GoPro App, RunCam App) and make sure the drone is connected to the camera’s Wi-Fi.
B. Configure Camera Settings (via App or Remote):
- Set Video Resolution and Frame Rate:
- Open the camera’s app (e.g., GoPro, RunCam) on your mobile device.
- Adjust video resolution (e.g., 4K, 1080p) and select the desired frame rate (e.g., 30fps, 60fps, 120fps for slow motion).
- Adjust Camera Angle:
- Use the gimbal’s tilt/roll function to adjust the camera angle to capture the desired scene.
- If the drone uses a fixed mount, physically adjust the angle by rotating the camera.
- Exposure Control:
- Use the camera app to set ISO and shutter speed for the appropriate exposure.
- If the camera supports manual settings, adjust to ensure balanced brightness.
- Adjust White Balance:
- Set White Balance to match the shooting environment (e.g., Auto, Sunny, Cloudy).
- Alternatively, leave it on Auto if the lighting conditions change often.
- Stabilization:
- Use electronic image stabilization (EIS) or ensure that the camera is mounted on a gimbal to reduce vibration.
C. Connect to Flight Controller (Optional):
- For more advanced control, you may link the camera’s settings to the flight controller (e.g., using Pixhawk, ArduPilot).
- Set up camera triggers or automated photo/video recording via the controller.
D. Test and Fine-Tune:
- Perform a flight test and adjust the camera settings while in the air.
- Check the video quality and make necessary adjustments to exposure, ISO, and tilt.
Conclusion:
By following these steps, you can adjust the camera settings for optimal footage quality on various types of drones, whether they are commercial, DIY, or FPV drones. Always test settings in different environments to achieve the best results for your specific needs.


