Repairing a drone camera can be complex, depending on the issue, but the process involves careful diagnosis and step-by-step repair. Whether your drone camera is experiencing issues like blurry footage, connection problems, or physical damage, understanding the common causes and knowing how to fix them can save you time and money. In this article you can understand how to repair drone camera with all solution.
1. Diagnose the Problem
Start by identifying the issue type:
Common Camera Issues

- Physical Damage:
- Cracked/scratched lens.
- Broken gimbal arms or mount.
- Loose camera housing.
- Electrical Issues:
- Camera not turning on.
- Video feed is black, flickering, or distorted.
- Wiring is loose, frayed, or disconnected.
- Software/Connectivity Problems:
- Camera not connecting to the app/controller.
- No video or photos saved.
- Firmware or compatibility issues.
- Mechanical Failures:
- Gimbal not stabilizing or moving.
- Motorized tilt adjustment not working.
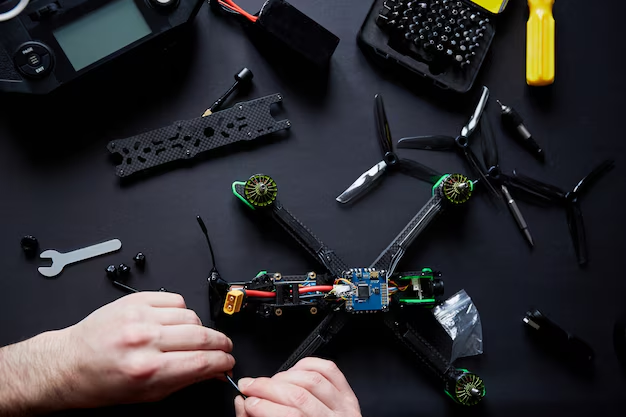
2. Gather Tools and Materials
Tools Required
- Screwdrivers (small Phillips, Torx, and flat-head).
- Soldering iron and solder.
- Multi meter (for electrical testing).
- Plastic pry tools and spudger.
- Tweezers (for delicate components).
- Hot glue gun or epoxy (for fixing cracks).
- Lens-cleaning kit (microfiber cloth, isopropyl alcohol).
Replacement Parts
- Camera lens (specific to your drone model).
- Ribbon cables or wiring harnesses.
- Gimbal motor or assembly.
- Housing or mounting parts.
3. Detailed Repair Steps
A. Repairing Physical Damage
1. Cracked or Scratched Lens
- Remove the damaged lens:
- Unscrew or detach the lens from its mount.
- Be cautious with ribbon cables and small components.
- Replace the lens:
- Use a compatible lens replacement (check manufacturer specs).
- Reinstall it securely and clean it with a microfiber cloth.
- Protect the lens:
- Apply a lens cover to prevent future damage.
2. Broken Camera Housing
- Inspect the damage:
- Look for cracks or broken mounts.
- Fix minor cracks:
- Use epoxy or hot glue for reinforcement.
- Replace severe damage:
- Install a new camera housing specific to your drone model.
3. Gimbal Arm Repair
- Tighten loose screws or bolts.
- Replace broken arms with compatible parts.
B. Resolving Electrical Issues
1. Camera Not Powering On
- Test the power source:
- Ensure the drone’s battery is charged and connected.
- Inspect wiring:
- Look for frayed or disconnected cables.
- Use a multi meter to verify voltage at the camera’s input.
- Resolder loose connections:
- Reattach wires to the PCB or connectors.
2. Video Feed Problems
- Check the transmission cable:
- Replace damaged cables connecting the camera to the transmitter or flight controller.
- Test the image sensor:
- Replace the camera module if the sensor is damaged.
3. Overheating
- Clean vents:
- Remove dust or debris from the camera module.
- Add heat-dissipating material:
- Use thermal paste or pads if applicable.
C. Fixing Software/Connectivity Issues
1. Camera Not Connecting to App/Controller
- Reset the connection:
- Re-pair the drone with the controller and app.
- Ensure the app is updated to the latest version.
- Check Wi-Fi or signal:
- Ensure a stable connection between the controller, drone, and device.
- Update firmware:
- Use the app or manufacturer’s website to update the drone and camera firmware.
2. Photos/Videos Not Saving
- Format the SD card:
- Ensure it is compatible and formatted to FAT32 or exFAT.
- Replace the SD card:
- Use a new, high-speed card (Class 10 or UHS-I minimum).
D. Mechanical Problems
1. Gimbal Not Stabilizing
- Calibrate the gimbal:
- Use the drone’s app or controller settings to perform gimbal calibration.
- Check gimbal motors:
- Test each motor with a multimeter for continuity.
- Replace non-functional motors.
- Inspect for obstructions:
- Remove debris that may block movement.
2. Tilt/Rotation Malfunction
- Check the tilt motor:
- Test with a multimeter for proper operation.
- Replace worn gears:
- Install new gears if they’re stripped or broken.

4. Testing the Repairs
- Reconnect the Camera:
- Secure all connectors and reattach the camera module to the drone.
- Power On:
- Turn on the drone and check for functionality.
- Test Video Feed:
- Ensure a stable and clear live feed.
- Perform Calibration:
- Calibrate the gimbal and ensure stabilization works.
- Flight Test:
- Verify camera performance during a flight.
5. Preventative Measures
- Lens Protection:
- Use a lens hood or UV filter to avoid scratches.
- Transport Safely:
- Store the drone in a padded case.
- Avoid Extreme Conditions:
- Do not fly in rain, sand, or high winds.
- Perform Regular Maintenance:
- Inspect the camera and gimbal after every flight.
How to repair drone camera
USA online stores for “How to repair drone camera”
- iFixit – https://www.ifixit.com
- B&H Photo Video – https://www.bhphotovideo.com
- Banggood USA – https://usa.banggood.com
Common Scenarios and Fixes
| Issue | Likely Cause | Solution |
| Blurry video feed | Dirty or damaged lens | Clean or replace the lens. |
| No video on the app | Connection issue | Re-pair or check wiring. |
| Gimbal shaking/vibrating | Loose screws or motor issues | Tighten screws or replace motors. |
| Black screen feed | Faulty image sensor | Replace the camera module. |
| Camera not turning on | Power issue or damaged board | Check power supply and replace damaged parts. |


